A look at the components of the Langstroth beehive and guidance on operational factors to keep your colony happy and healthy.
Introduction
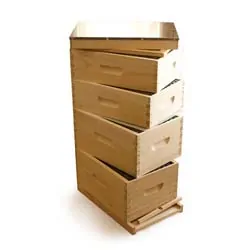
The Langstroth hive is currently the most commonly used in North America. They’re the hives you’ve likely seen on roadsides or trailers. The Langstroth is a vertical frame hive, meaning that wax must be built vertically and inside frames provided by the beekeeper.
There are multiple bee hive parts through which the beekeeper can expand his or her hive and the fact that the Langstroth is now something of a standard means parts are interchangable across manufacturers.
In this post we look at the components of the Langstroth, as well as the offering guidance on operational factors to keep your colony happy and healthy.
Components
Frames and Supers
Langstroth hives come in both 8 and 10 frame sizes. Ten frames are more commonly used, but eight frame bodies are gaining popularity due to their lighter weight and closer match to natural bee habitat. Each hive size, whether 8 frames or 10, consists of varying box sizes, known as supers. Deeps are typically used on the bottom and contain brood; mediums and shallows are added on top to hold honey.
Each frame optionally contains foundation, which is either beeswax or plastic with preformed comb shapes and sizes. Wax foundation contains chemicals from the original wax used to manufacture it. A sticky bottom board can be added for mite counts.
Entrance Reducers
Entrance reducers should never be used during peak honey season, but do have an important place. If the hive is in a weakened state, entrance reducers can be used to protect the hive from robbers and jackets. They’re also used to reduce drafts during the winter and to fumigate with natural essential oils, as an alternative to chemicals.
Queen Excluders
Queen excluders are an option with a fair amount of debate surrounding their use. For those who use them, they’re typically placed between the brood boxes and the honey boxes with the intention of preventing the queen from laying eggs in the honey supers.
The downside of this is that they can be high maintenance. Bees often attach comb to the excluder, which reduces the size of the passageway between the brood comb and the honeycomb. The drones, with the larger bodies, often become stuck in this smaller passageway and may block it entirely. By discouraging travel between to the honey supers, a queen excluder may reduce honey production in the hive.
Some beekeepers find using a queen excluder beneficial when preparing to split a hive to prevent a swarm. Those same beekeepers point out that by crowding bees into the bottom “brood” supers with limited access above the queen excluder forces bees to swarm so they elect only to use the excluder when it’s time to split the hive.
Feeders
Open Air Feeders
Open air feeders are literally that – feeders set up in a field or other location outside the hive. These are not recommended because they attract all types of wildlife, not just bees, and can cause bees sharing the feeder to fight, which weakens the bees and the hive.
Entrance Feeders
An entrance feeder consists of a tray inserted into the entrance and an inverted feed jar outside the hive. Although these feeders make it easy to see how much is left and to refill the supply, they have problems as well. The feed containers are small and don’t hold much. Also, because they are outside the hive, the liquid will freeze in cold weather. Beekeepers are also reluctant to use entrance feeders due to the increased potential for robbing; the food is at the entrance and difficult for the bees in the hive to defend.
Division Board Feeders
Division board feeders are inserted in place of one of the hive frames. While it’s a plus that they’re inside the hive and they’re fairly easy to fill, most beekeepers find that they don’t work as well as they hope. Division board feeders were designed with the intention that bees are able to climb out, but sadly, many bees drown in these feeders. In addition, if the feeders get empty for too long the bees will build comb or propolis on them, rendering them unusable. Further, many beekeepers find that these feeders also either leak or cause the surrounding frames to be difficult to remove.
Internal Hive-Top Feeders
Internal hive-top feeders fit beneath the cover and above the brood boxes. They hold a lot of food and are easy to fill, but despite many clever attempts to deign them in ways to prevent bees from drowning, lots of bees seem to suffer that fate anyway. Moving the feeder off the hive while it’s full is also often a recipe for disaster since it is heavy and the syrupy food sloshes over the sides, creating a huge mess. In addition, mold frequently builds up in the feeders.
External Hive-Top Feeders
This method is excellent for commercial beekeepers and hobbyists with a large number of hives. External hive-top feeders are large containers inverted over the entrance hole in the inner cover or sit on top of the hive. They hold a large amount of food and typically don’t get moldy as the syrup is not exposed to air. The downside is that high winds or animals may move the feeders. Also, the containers can be heavy and slippery, especially in the rain, so care must be taken when moving and filling them.
Baggie Feeders
The baggie part of a baggie feeder is a zipper bag filled with syrup. This baggie fits into a specially designed rim, similar to a 3-inch deep super. The bag is slit open and the bees drink through the slit. Bees have no chance of drowning with these feeders although a few may crawl under the plastic and die there. The heat generated within the hive keeps the syrup from freezing. The negatives? Once in place, it’s virtually impossible to move and the baggie is used once and thrown away, which not environmentally friendly.
Operation
Weekly hive checks need to be performed. In addition, as the hive grows, appropriately sized supers must be added to accommodate bee activity. The majority of Langstroth hive keepers use chemicals prophylactically on a set schedule to treat the potential of hive pests and diseases. This schedule depends on the weather and geographic location.
Inspection Process
Before you don your bee gear, understand why you’re opening the hive. What are you looking for? Brood? Honey? The queen? Next, and still before you put on the bee gear, check the weather. A warm, sunny day is ideal because most of the foragers will be out doing their foraging thing – meaning you’re less likely to be stung.
With bee gear finally on, be sure to stand at the back of the hive so that you don’t block the entrance. If you like, use smoke or sugar water spray to calm the bees. Note that if you use smoke, it’s a good idea to puff some into the entrance, but that in doing so, you will cause the bees to think there’s a fire and in response, they will start to eat their honey stores.
When you’re ready, remove the lid and turn it upside down on the ground. This makes a perfect place to rest supers. Again, if you like, puss smoke or sugar water spray around the inner cover. When you’re ready, remove the inner cover. If you have more than one brood box and/or any honey supers, stack them on the inverted lid.
Start at one end of the bottom brood box and remove the frame. Inspect both sides and set it aside in a safe place. Continue sliding frames towards the empty space left, remove, inspect, and replace them in the same orientation as they were when you opened the box. Be sure to hold frames over the box so that you don’t risk losing the queen. When all the frames have been inspected, slide them back to their original position and replace the frame you removed. Continue this process with remaining brood boxes as you restack them in the proper order.
Verifying a Healthy Hive
1. Capped brood comb in a tight, compact pattern with few or no gaps indicates a healthy queen
2. New eggs. These look like tiny grains of rice inside uncapped comb with a clear gel surrounding them. Eggs indicate an active queen within the last 3 days.
3. New comb. White and waxy, new comb indicates an active hive preparing for brood and a healthy honey flow.
4. Nectar, pollen, or honey in the cells proves your foragers are out and doing their jobs.
5. Pollen stored in an arc next to the brood nest. This is typical in Langstroth hives.
6. Drone brood in about 10% to 15% of the brood cells. Drones help increase genetic diversity and may also perform environmental control functions within the hive.
Warning Signs
1. Supercedure cells. These are queen cups pulled from the center of the comb, rather than the edge, and usually mean the hive has determined the queen is unfit.
2. Swarm cells. Queen cups drawn from the edge of the comb; these typically indicate the hive is preparing to swarm. Swarms are a sign of a healthy hive, but if you’re looking to have more bees or share them with a fellow beekeeper, this is a good time to prepare for a swarm split.
3. Drone brood in more than 20% of brood cells may be signs of a “laying worker” situation where the queen has died or somehow gotten out of the hive and the female (worker) bees have begun laying unfertilized eggs.
4. Signs of disease such as brown-ish eggs in uncapped comb.
Pros and Cons
| Pros | Cons |
|---|---|
| Common; easy to find a mentor | 10 frame hives are wider than bees’ natural habitat |
| Interchangeable equipment | Can be harder for bees to move up mediums in winter due to large gaps |
| High honey production | Large storage for unused components is necessary |
| Easy to find equipment and supplies | Inspections are invasive |
| Foundation and frames prevent “cross-combing” | Foundations contain chemicals and are less natural |
| Fairly inexpensive | Heavy |
Summary
For beekeepers seeking a high honey yield, the Langstroth hive might be the preferred choice. For those wishing to do so, chemicals can be avoided by not using foundation and using chemical-free hive management techniques.
See our Hive and Equipment Choices article for additional information.