Happenings in the Bee Yard
Before I launch into this week’s topic about making choices, I want to share some surprises that happened in my bee yard this week. On Monday, my bee mentor came by to assist me in my first inspection. Just as an aside, new beekeeper’s need a mentor. If you don’t have one, find one quick! In one short hour, I learned quite a bit. I probably would have figured things out by trial and error, but some things are better to know up front. With two hives, I am learning you never know what may happen next!
The Strong Hive
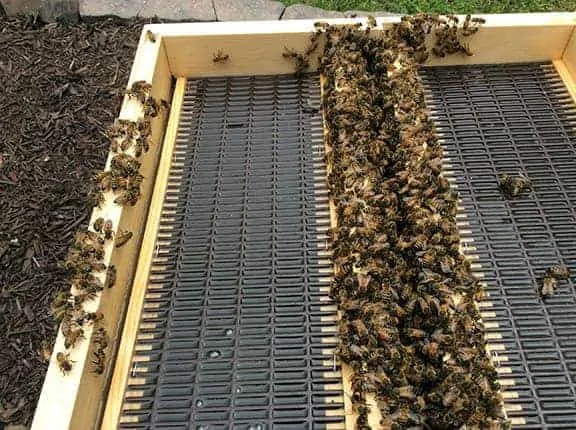
Of my two hives, the first is the strongest. Inspecting this hive, we still did not find the queen (she is a very elusive lady!) but everything looked great including the brood pattern, eggs, young larvae, older larvae, and tons of capped brood. The queen is there and I will keep trying to locate her so I can mark her for easier identification in the future.
Replete with workers and a complement of drones, this hive is really working to draw comb. They seem to delight in building comb in the openings for the top hive feeder. Inspecting this hive, there were no real surprises.
The Weaker Hive
But the surprises came quick while inspecting the second hive. This hive is not as strong as the first hive. This marked queen is a real beauty. It isn’t really clear why this hive isn’t as strong. But, on the third frame inspected, we found a capped queen cup. The beautiful peanut-shaped cup (no pictures as I had my hands full!) is in the swarm position. So, this new beekeeper was quite surprised to say the least.
Luckily, I had purchased a nuc last weekend never expecting that I would be using it almost immediately! We continued our inspection and on the very next frame we found two more queen cups (my inspection Friday found that another cup is now capped!).
Stopping a Swarm
So, I had to learn how you deal with avoiding a swarm. The trick is to move the queen into a nuc with a frame of brood, two frames of food, and two new frames with no drawn comb. What does this accomplish? It simulates a swarm.
You are tricking the bees into thinking that the old queen has departed and there is no need to swarm. This leaves the existing hive queenless while they wait for the new queen to emerge. Now granted a lot can go wrong yet, but I had no idea that in my first two weeks of beekeeping I would have to perform a split and purchase equipment for a third hive. Beekeeping is definitely not a dull endeavor.
Making Choices
The Hive
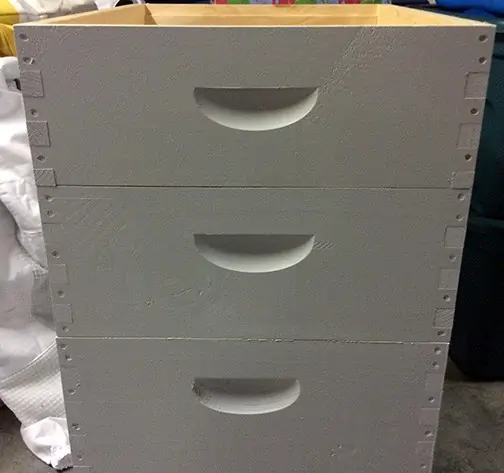
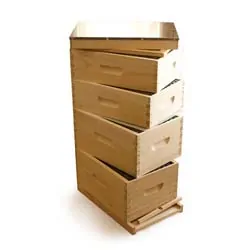
The first choice a new beekeeper must make is which type of hive they will use with their bees. Although there are numerous types of hives, the choices usually fall into three main types:
Each of the major types of hives are valid choices for beekeepers and each have their devoted following.
Examining the three options, I liked the versatility of the Langstroth with the option of choosing between 8-frame and 10-frame setups. I also liked the ability to setup different box configurations of deep, medium and shallow, with differing frame sizes. Additionally, I liked the versatility of choosing between 8-frame and 10-frame options which is a limiting factor for the Warre style.
After examining the options, I chose the 10-frame Langstroth made from pine for my hives. I also chose to use deeps for my brood boxes with a medium and two supers for honey production.
Frames and Foundation
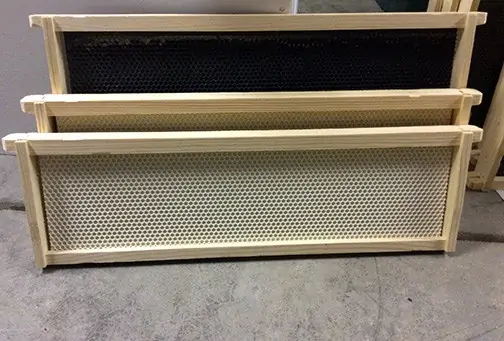
Once you choose the type of hive, you have to consider all the options for frames to place in your hive boxes. The permutations for frames were daunting at first. Frame top bars can be Wedge Top or Grooved Top. Frame bottom bars can
be Divided or Grooved. Then, you have to decide will you go foundationless or will you use thin foundation, cut comb foundation, crimp wire foundation, or plastic.
I admit that when I first started considering these options I felt pretty well adrift. I definitely did not like the foundationless approach, as I had read that it was easy for the comb to potentially break when inspecting your bees. As a “newbee,” I didn’t need that sort of challenge. I also did not like the plastic frames as they have crevices in which small hive beetles can shelter.
In the end, I chose superframes. With both staples and glue, superframes have added stability. They also use plastic foundation coated in beeswax.
These frames are ready to use, which gives a new beekeeper an easier start. One item I should note is that folks interested in Integrated Pest Management (IPM) use Plastic Drone Frame since the Varroa mite tends to like using the larger drones for their reproduction (more protein).
Editors Note: One of the key reasons that varroa are thought to be attracted to drone cells, is that drones take longer to emerge from the cell, which provides the varroa with more time to reproduce.
Bottom Boards and Hive Stands
So you thought making choices would be easy right? Well, I thought so too at first but then I started finding that you are making choices over and over again as you get started.
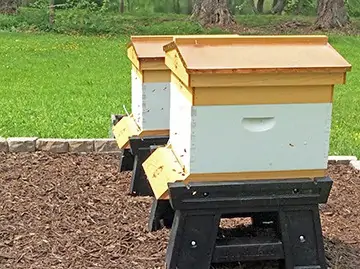
The next choice I needed to make concerned the stand. It is quite common for beekeepers to use lumber and cinder blocks to form stands for their hives. As my bee yard would be in the middle of my expanding flower gardens in my back yard, cinder blocks and lumber were definitely not on my agenda.
There are any number of options for hive stands including metal hive stands and heavy duty plastic hive stands. Examining the options, I decided to use the Ultimate Hive Stand which has the option to fill the base with sand as well as providing frame holders and security screws that actually screw into your bottom board. I have two of these and am quite pleased with how sturdy they actually are.
In addition to the hive stand, you need to decide about a bottom board for your hive. The options include solid bottom boards, screened bottom boards, IPM bottom boards and even a combined hive stand with an integrated IPM Bottom Board.
As I want to use IPM approaches with my hives, I chose the Ultimate Wood Hive Stand which integrates an IPM Bottom Board and Hive Stand together. I like the integration of the two together, including the sloped landing pad for the workers arriving back to the hive from foraging flights.
Feeders
Another key choice relates to feeding your bees. There are many ways to feed your bees, but a newly installed colony needs a steady supply of sugar syrup to assist them in producing wax to draw comb.
As you probably already guessed, yes, you have multiple options.
- In-hive feeders require you to place a hive body over the feeder, usually a deep.
- Entrance Feeders use a quart mason jar to attach to the entrance feeder. Entrance feeders can lead to robbing.
- Baggie Feeders are a “small super” that allows you to place 2-one gallon zip lock baggies filled with 6 pints of syrup on top of your frames.
- Division Board Feeders are placed in your deep or medium hive body and take up one frame worth of space.
- Hive Top Feeders allow you to set the feeder on top of the colony and then cover it with an inner cover. These feeders provide center access to the syrup and hold about two gallons of syrup.
I liked the capacity and easy access of the Hive Top Feeder and chose the wooden variety for my hives.
You will need to make sugar syrup. So, be prepared to purchase significant quantities of sugar at your local grocery store and be prepared for the strange looks the clerks are going to give you when they see how much sugar you are purchasing.
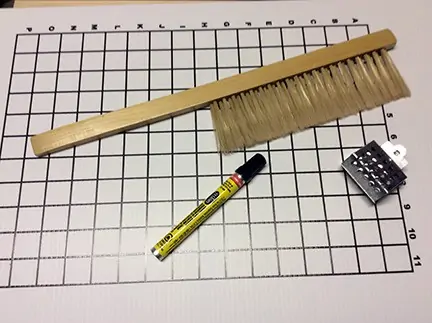
There are also some useful supplemental products that include essential oils that both preserve your sugar syrup and boost the immune system of your bees. I am using Vitamin B Healthy, Honey B Healthy and Super Plus in my sugar syrups. It makes your house smell delightful and if you have cats, they get quite curious about what you are mixing up.
Hive Tops and Inner Covers
Making choices is hard work. It is difficult to make these choices. But never fear, you are closer to completing your decision-making at this point.
Hive tops come generally focus around two options, an A-Frame Top or a Telescoping Top. The hive top of course is critically important as it helps keep your bees dry and protected from the elements. Which type of top you choose is largely a choice of aesthetics.
The cheaper option is the Telescoping Top. It is very likely that most people who have seen many beehives have seen this top.
An alternative top is the English A-Frame Copper Top. With that beauty comes a downside, these tops are heavier. Of course, copper will take on a patina over the course of a year. This type of top is a little more expensive,
Since my bee yard is in my gardens in my backyard, I opted for aesthetically pleasing to fit into the overall look of the gardens. and therefore chose the English A-Frame Copper Top.
As a side note about this, I overheard some of my neighbors remarking about my hives as they were walking. One of them said “those are the most beautiful beehives I have ever seen.”
Inner Covers also come in many varieties including the Goble Inner Cover, the Ventilated Inner Cover and Moving Screen, the Wintering Inner Cover, and the Vivaldi Board, just to name a few.
I intend to examine the Vivaldi Board for a possible winter inner cover. But, in this case, I chose the simple Goble Inner Cover.
Other Hive Accessories
There are a few other hive accessories that you need to have at startup or consider in the long-term. The first important accessory is an Entrance Reducer. A new hive is not at full strength yet. Using an entrance reducer allows a hive to defend less territory if other bees decide to try to rob the hive. I have an entrance reducer on both of my hives and on the nuc.
Once your bees start producing excess honey (probably not in your first year if you want them to overwinter!), you will likely need a Queen Excluder. There are various types of queen excluders available, including metal and plastic. Queen excluders keep the queen from getting into the honey supers and laying eggs. Who wants eggs and brood in their honey!?! But, there is some controversy about the need for queen excluders.
Bee Suits, Smokers, Hive Tools, and More
Making choices includes a very important choice, a bee suit. There are multiple different varieties of suits and veils available. I am not going to exhaust you with the number.
Unless you are truly the bee whisperer, you will likely want a bee suit with gloves to work your bees. I chose a ventilated bee suit. If you live in even a moderately hot climate, you will appreciate the ventilation! I also purchased the ventilated cowhide gloves to go with the suit. I’m not ready to work my bees bare-handed just yet!
You will also need to purchase a good smoker. The smoke makes your bees think that they are about to experience a fire and so they will dive into the hive and start loading up on honey. I chose a standard smoker for working my hives. I have to admit that I enjoy looking at the frames and seeing lots of little worker bee butts sticking up in the air as they gorge themselves on honey!
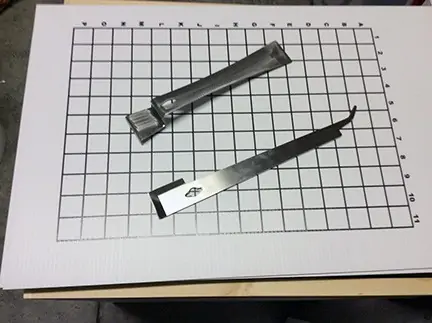
You also need a good hive tool to allow you to scrape propolis and burr comb away, as well as sometimes pry your hive body apart. Hive tools come in many varieties.
I have two hive tools, the EZ Hive Tool and the Frame Lifter Hive Tool. The latter has a handy hook for helping you lift frames after you have pried them apart.
Finally, you should have a Bee Brush. The bee brush allows you to brush bees from a frame for better inspection or when harvesting honey. It is also useful for brushing bees from the top frames when you are trying to place the inner cover.
Making Choices Is Hard Work
All of these choices may seem like hard work. But the decisions you make are important and thinking through everything you need is important.
One thing I will say is don’t be afraid to ask questions of experienced beekeepers. They are able to filter through the sales hype and tell you what has actually worked for them. You don’t have to make these choices alone.
Next week, we’ll talk about setting up the bee yard and the hives. And, I’ll have an update on the emergence of that new queen!
Until next time, happy beekeeping!