Free bees!
Who doesn’t like the sound of that? If you are a beekeeper – or are soon to be one – you will know that there are some upfront costs, beyond the hive itself.
One of the most expensive, if you follow the more common options for sourcing your bees, are the bees themselves. With packages around $120 (at the low end) and nucs of bees starting at around $160, it’s not cheap to start a new hive this way.
One reason why splitting a hive is attractive to many beekeepers is that you turn a single colony and a single queen into two colonies and two queens.
Of course, they are not really “free”. You purchased them initially, probably as a package or a nuc. Now you are merely dividing off a few of them to form their own colony. As we will see, you may even purchase a new queen. In that context, you’ve still “paid” for every bee!
But you will at least have saved a considerable expense, as compared to buying another package or nuc.
This is just one of the benefits of a split. But it’s probably one of the least important.
We have discussed the benefits of having more than one hive. We looked at how a crowded hive may swarm. We covered the dangers of mites. We mentioned that it’s possible to create your own queens. And we discussed the benefits of nucs.
With all of these situations, there is real value in splitting a hive. This process, carried out by many beekeepers every year, offers a wide number of benefits, is simple to do, and happens to be great fun!
What is a Split?
As the name implies, a split literally splits one colony into two. By taking a strong, vibrant colony you create two. Aside from the obvious benefits of expanding your beekeeping world, there are some compelling reasons to split a hive, some of which may be reactive in nature. But the end result is the same regardless of the reason – from one, comes two.
Why Split a Hive?
Create a New Colony
Perhaps the most fun reason is that you want another hive! We hope you started with at least two beehives. However, perhaps you didn’t and you’ve seen the light. That second hive is ready to go and you just need new bees. Or maybe you have a few beehives, but you have been locating swarms or buying bees for each one and want to learn another way.
Whatever the case, a split is an excellent way to populate a new beehive.
Raise a Queen
We will look at raising queens in a separate lesson, but a split is a great way to obtain a new queen at no cost. The new hive has all it needs, including workers who will recognize the queenlessness of the hive and take matters into their own hands.
Avoiding Swarms
Logically, this makes sense! You have a healthy colony that is outgrowing its living quarters, so what better option than to double its space with an extra hive?
Splitting a hive is a common response to signs of swarming, on the part of the beekeeper, assuming he or she has noticed the threat in time.
When to Split
It is important that both sides of the split have a good chance to build their resources quickly if they are to have a shot at getting through the winter. This means both having access to foraging resources, as well as enough time to build up within the hive.
For this reason, mid-spring is a good time to split. That gives the colonies the whole summer and is also just before the honey flow.
Prerequisites for a Successful Split
As we will see below, there are a number of ways to achieve a split. But first, there are things you need to be in place or, at least, know will soon be in place. Without these, the chances of a successful split are low.
A Strong “Mother” Colony
A weak colony won’t magically split to create a strong colony (if only life were so easy!). By definition, a split divides existing resources and to ensure success, both sides of the split must have sufficient resources and be in good health after the split.
One implication of this is that you should not split a new colony, such as one you may have recently started with a package or a nuc. The original colony will already have its work cut out to build enough honey reserves to make it through the winter. Splitting a new, immature colony just creates two colonies that have even fewer resources.
Use Overwintered Colonies
This is really an extension of the previous point, but somewhat more direct. Don’t split a first-year hive. Such a hive will need all the honey it can get to make it through the winter. Don’t put it at risk.
Another advantage of this approach is the genetic implications assumed from overwintered colonies. There are many factors affecting whether a colony can get through the winter. One is simply a genetic disposition to do so. If you use only overwintered colonies then you are selecting for that characteristic, by design.
Two Queens
After the split is complete you will need one queen in each colony. Given that you started with one colony – and hence one queen – you need another queen!
There are two ways to achieve this:
- Introduce a new mated queen
- Let the new colony create its own queen
For the first approach to be successful, there must be drones available, since the new queen will need to mate. The new colony must also have eggs, larvae, nurse bees, honey, and pollen.
An important consideration is how long it takes for that new queen to start laying eggs. From her own start as an egg to emerging as an adult queen will be 16 days. Then she has to mate, which may take another week or so. That’s more than three weeks from the split to when the first eggs are laid by the new queen. That assumes all goes well, of course.
By comparison, if you introduce a mated queen in a cage, she will take a few days to emerge from the cage and then maybe another five days to start laying. This is, therefore, a quicker route to reach the point where the queen is laying.
Protection
A split creates two smaller colonies. They will be low in numbers and probably unable to protect themselves well. Therefore protection against robbers should be considered, such as the use of an entrance reducer, until they can fend for themselves. This is really just part of the consideration for any newly established colony.
How to Split a Hive
There are several ways to split a hive.
The key to a successful split is ensuring that, after the split, adequate resources are available on both sides of the split (both hives). This means the full lineup of resources: brood, nectar, pollen – and of course bees.
Let’s look at one of the more common ways to split a hive, which illustrates a number of important points.
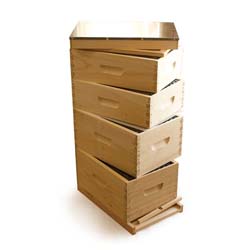
Set Up a New Box
Near the initial hive, set up a bottom board and a box, ready to receive the split. You will also need an inner cover and top cover on hand, to complete the hive.
Move Brood
From the original hive, grab four or five frames of brood, at different stages. You should at least be sure there are eggs or young larvae in both hives.
If you are hoping the new hive will create a queen you have an additional consideration. Remember how the colony decides whether to make a queen? A selected egg will continue to be fed royal jelly, beyond the third day. So let’s say you move across only larvae. At that point, it’s too late. The workers have no way to offer the royal treatment to any egg – since there are no eggs. That colony cannot make a new queen.
Therefore, you need to move eggs into the new hive if you have any chance of the colony creating a new queen.
Move Nectar and Pollen
Then move across some frames with nectar and pollen, so the new colony can immediately get to work, but also has something on which to feed.
Add Bees
Take a few frames of bees from the mother colony and shake them into the new hive. Normally 3-4 frames of shaken bees should be good enough. Make sure, though, that you are adding young bees, who can act as nurse bees. Also, make sure you don’t transfer the original queen!
Close Up
Pop the inner cover on the box, then the top cover and you are done.
Potential Challenges
After the split is done you should monitor the two hives and see them grow, including creating the new queen. But there are opportunities for things to go wrong.
Robbing
Remember that robbing can occur when a strong, large colony locates a smaller one. You just created two small colonies! If you have other hives with strong colonies nearby you may have a problem on your hands.
If this is a concern, one option is to move the split hives to a different location, and then move them back when they are able to defend themselves.
Lack of Queen
The planned queen in the new colony may never materialize, so you just end up with a queenless hive. Be on guard for that by checking the new colony after a few days.
Too Few Bees
When you move across frames, you will need to make sure there are enough nurse bees. If you fall short in how many you transfer then your hive can experience problems.
How Many Splits?
It may have crossed your mind that you could possibly split the same hive multiple times. That is true. While a single split is worthwhile, some beekeepers split the same colony multiple times per year.
If successful this can really expand your universe of bees very quickly.
In Summary
Here’s a good video that shows a split from start to finish. Fun, eh?