One of the nice things about beekeeping is that it involves a certain amount of downtime. Your bees know what they’re doing, and you don’t need to check on them every day. In fact, you shouldn’t. But if you leave them alone completely, they may run into trouble.
Swarms
One problem that many beekeepers face is the prospect of swarms, which we’ve already covered in Inside and Outside of the Beehive. Swarms aren’t inherently bad. In fact, it’s good news for the bees because it means they’ve split into two healthy, viable colonies. It can be bad for you, though, because it slows down production. Swarming also means that your queen disappears and is replaced by a new one. This isn’t necessarily bad, either, but if your queen is a good one, it’s hard to see her go, especially when you don’t know what her replacement will be like.
Unfortunately, swarms are a natural product of good times. If your bees are doing well, they are more likely to swarm. It’s a difficult line to walk, and sometimes it’s unavoidable. There are some things you can do to make it much less likely, though.
Bees do give you a sign that they’re planning on swarming. When about 80% of the frames are filled with brood, drones make up more of the population, and long, peanut shaped queen cells start appearing, you can be pretty sure that a swarm won’t be far behind.
One thing that you really shouldn’t do is destroy the queen cells. This used to be a common piece of advice, but it’s more or less been discredited now. One part of the problem with it is that once bees get it into their minds to swarm, there’s not much that can be done to deter them. Even if you remove queen cells, they may simply make more.
Another possibility is that the colony will stay but become weaker, both foraging and laying less. There is also a chance that the appearance of queen cells is not the sign of a coming swarm, but of a failing queen. If this is the case, you’re only hurting the colony by forcing it to keep a queen it doesn’t want. The best thing to do is to make your bees comfortable and try to prevent swarms before they happen.
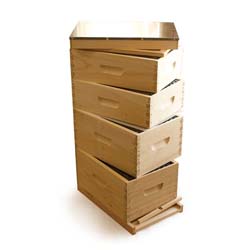
Bees swarm when they run out of space. An obvious way to offset the process, then, is to give them more room. This can be achieved by giving them two brood boxes or a single deep one. You can also try “checkerboarding.” You can do this by allowing the top super to fill with honey, then removing every other honey filled frame and replacing it with empty comb for brood.
This one will not work with a queen excluder – the whole object is to allow the queen to lay in the same box as the honey. Another method is the addition of honey supers. If the bees have a designated place to store their honey, they’ll be able to devote all the space in the brood box to population and are going to get overcrowded less quickly.
“Less quickly” is the key phrase here. As long as your bees have ample food, they are going to be working toward a swarm. The only way to prevent a swarm is to offset it long enough that either the nectar flow slows or the winter turns cold.
There is another way to delay swarming, called queen clipping. It’s not easy, and it only buys you an extra week or so. The whole point of it is to give the beekeeper some extra leeway during peak swarming season. To do it, find the queen and hold her gently in your fingers. With a pair of small and very sharp scissors, very carefully cut off the top third of the queen’s wings. Queens are surprisingly tough, and she’ll be able to handle it. She won’t be able to fly, however. This means that if swarming takes place, the queen will fall to the ground instead of taking off.
The rest of the swarm won’t go anywhere without her, so they’ll return to the hive. The queen, sadly, won’t be able to get back in, and she will die. The colony will be taken over by one of the new queens prepared for the swarm. Since the hive is already overcrowded, this new queen will almost definitely lead a swarm of her own, but she won’t do it until she’s laid some queen cells of her own, which will take about a week.
Since this process is so involved, kills a queen, and doesn’t even set the swarm back much, it’s really only recommended if your nectar flow is high and you don’t have the time to check on your hive frequently.
There are other methods that involve more direct manipulation of the colony, called the Demaree and the Snelgrove methods. These are really only possible after queen cells have appeared. Both involve separating the queen and foragers from the brood and nurses. The queen and foragers will go about business as usual in one box, while in another box the brood, including a new queen, are reared. At this time, you can destroy the new queen cells without a problem. Since the brood are kept separate from the queen, she can’t keep producing new queens and a swarm can’t occur. If you want, you can also use this method to raise a new queen and create a nucleus.
Nucleus
Making a nucleus is a good way both to avoid swarms and to be prepared to replace a lost queen. It can only be done when a colony is close to swarming, when there are viable queen cells present.
Take a frame from your hive that has a good sized queen cell on it. Make sure there is only one cell, and that your current queen is not on the frame. Move this frame, along with one frame of brood and one frame of food, to a nuc box – a smaller box meant to hold only a few frames. Fill up the rest of the box with frames of foundation. Shake three frames covered with bees over the nuc box. The bees will fall off the frames and into their new home.
It’s a good idea to shake bees that are on a frame full of brood – these are most likely nurse bees, and they’ll be needed to take care of all the brood you’ve just transferred. Make absolutely sure that the queen is not on any of these frames. The new queen will be born in this nuc to her own mini colony, and the old hive will have some new space freed up (to be replaced by new frames of foundation).
Nuc boxes are meant to be smaller than regular hives. If you fill one in the spring or summer, though, the new colony will have time to grow and flourish and will soon be at risk of swarming itself. Be ready, after a month or so, to move it to a full sized hive.
Making a nucleus is usually most successful if bees from multiple colonies are used. Drawing some bees from multiple colonies ensures that you don’t cut any one colony down to too few bees. You should take from at least three colonies. Combining bees from two colonies will likely start a war. Three or more is best. Take one box of brood and one frame of bees from each. You can also use only one colony, as long as you have enough bees to supply the nuc box.
Queenlessness
Queen bees can live for up to five years if they’re lucky, but they don’t always make it that long. They can succumb to disease or be eaten by predators. Sometimes they can just fail. When a queen dies, the colony gets very upset, fanning their wings and sometimes roaring.
You’ll also know something is wrong because you’ll notice your workers laying eggs. While queens lay a single central egg per cell in an even pattern, workers are disorganized, putting multiple eggs in the same cell, skipping cells, and sticking them to the walls instead of in the middle. To be fair to them, they’ve never gotten a chance to practice. The queen exudes a pheromone that keeps the workers from laying. If the queen dies, however, the pheromone disappears and the workers start reproducing. This is totally unsustainable, though, because workers can’t mate. They can only lay unfertilized eggs, which hatch into drones, and drones can’t do anything useful. A colony without a queen will most likely be dead in a month.
Luckily, queenlessness is a problem that often solves itself. Both worker and queen larvae are fed royal jelly for the first two days of their lives. On the third day, workers are switched to bee bread, while queens keep eating royal jelly. If the bees can get their act together by the the third day, they will pick a few of the larvae to keep on the royal jelly diet and extend the size of their cells to accommodate their bigger queen bodies. If this happens, the bees should be fine. If you don’t open up your hive very often, it could even happen without your realizing it.
If the bees miss that two day window, however, you need to requeen.
Requeening
Requeening is the action of introducing a new queen in an established colony. You may have to do it if your current queen dies, but that’s far from the only reason. Certain genetic diseases, like the ones discussed in Threats to Bees, can be combatted by requeening.
A colony that’s aggressive or low performing will usually have a complete change of attitude and morale with the introduction of a new queen. And though queens can live for three to five years, they often only have one to two good years of production and disease resistance in them. Some beekeepers believe in requeening every year to keep the colony healthy and strong.
So how do you requeen a colony?
First, you need to find yourself a replacement queen. Queen bees can be ordered for somewhere between 20 and 40 dollars each, though they’re not always available. If you’re in a pinch, talk to your nearby beekeepers – someone is likely to have a spare queen or queen cell they’re willing to part with. If you’ve made yourself a nucleus, you can introduce that queen.
The easiest option, of course, is simply to let nature take its course. If you remove the current queen, the bees should set to work immediately raising a new one from the remaining fertilized eggs. It’s easier and cheaper, and the likelihood that the colony will accept the new queen is much higher. It does, however, set production back a few weeks. This new queen still has to hatch, grow up, and go on her mating flight before she can start laying. A mature queen can get started right away.
Wherever you choose to get your queen, make sure you have her on hand before you do away with your current queen. Next comes the difficult task of finding her. Queen sellers often charge an extra dollar or so to put a dot of brightly colored paint on their queens’ backs, and it’s well worth the money at a time like this. Queens are noticeably bigger than workers and drones, but in a sea of tens of thousands of bodies it’s not always easy to spot the difference. If your queen is unmarked, it often helps to pay attention to the activity of the workers. A group of attendants will usually be ringed around her – look for a circle or semicircle of workers and see if the bee in the middle looks different. That’s your queen.
You can pick your queen up with your fingers – queens can sting (multiple times!), but they often don’t. Once you’ve got her, it’s up to you do away with her. It may seem cruel, but a quick stomp of the foot will end it quickly and benefit the colony as a whole.
You should wait at least 24 hours before introducing your new queen. Don’t wait more than two days, though, unless you want the bees to produce a new queen of their own.
Just because you believe in your new queen doesn’t mean the colony does, and introducing a new queen can be tricky. If you simply plop her into the hive, chances are good that the bees will kill her.
The best way to get a colony to accept a new queen is to put her in the hive in a protective cage, so the bees can get used to her scent but not reach her and kill her. The easiest way to do this is to use the little mesh cage commercial queens are shipped in. The cage has a single hole in it that’s plugged with a cork made of sugar. If you carefully poke a hole through the cork, the smell of sugar will attract the workers and they will gradually start to eat it. In the time it takes them to eat through and release the queen, they should have grown accustomed to her. It’s a very convenient time release.
If your queen hasn’t come in a mesh cage, you can make your own easily out of a stiff screen bent into a box shape with an open bottom. Place the queen in the box, and press the open bottom into the wax of the comb.
Robbers
There is one threat to your beehive that we haven’t touched upon yet: other bees. Bees usually forage for their own food, but if there’s a real shortage of nectar, they’ll go for the next best thing, and that’s what their neighbors have stored up.
Robbing bees are an especially big problem in the southern US, where nectar flows often dry up in the height of summer. It’s also more likely to happen if you have multiple hives close together. You may notice lots of bees flying or fighting around the hive entrance – this is usually a sign that one colony is invading and robbing from another.
The very best thing you can do to prevent robbing is to keep your colonies strong. Healthy, populous colonies with young queens ought to be able to fight off any intruders. If your queen is old, however, or if your bees aren’t numerous enough to protect their territory, they’re at risk. It’s also important to keep the temptation away from the bees, especially if nectar flow is low. If you have multiple hives, only ever open one at a time, and always keep the honey supers covered. Clean up any honey or syrup spills after you’re done.
If robbing is already happening, the best thing to do is to move the weak colony away from the others. Add an entrance reducer so only one to five bees can fit through the entrance at a time – this should help the weaker colony defend itself.
Overwintering
Keeping bees for honey makes for a difficult situation – you want the honey to eat and sell, but the bees need it to survive the winter. It’s the reason they store it, after all! So how can you strike a balance and keep both you and the bees happy?
A lot of it depends upon how harsh your winters are. Bees in warm climates can survive with as little as 40 pounds of honey stored in the hive. Middle climates need 60 pounds, and cold climates need 80 or 90 pounds.
Ideally, you’ll leave enough honey that the bees will be able to fend for themselves. But this isn’t always possible. The winter may be longer or colder than you expected. The bees may be weak. Or you may simply take too much. That’s why supplemental feeding is a good idea. Most colonies are lost during the winter, so if there’s something you can do to help the bees through, it’s best to do it.
You can make a simple syrup out of sugar and water that should keep them fed. In fall and winter, make a solution of two parts sugar to one part water. You can add supplemental nutrients to the syrup if you’re worried about your bees eating only sugar. You can buy a variety of feeders, from hive top to division board, but the main thing is to make sure the feeder is inside the hive. Entrance feeders require the bees to leave their warm clusters and simply won’t work in the cold of winter.
Bees don’t just sit around and eat all winter. They have to stay warm, and the only way to do that is to huddle in a cluster and beat their wings. It works incredibly well, but it takes a huge amount of energy. This is why it’s so important they have a constant food supply. You can help them to retain the heat they produce with insulation. You have to be careful about wrapping the hive in anything, though, as a lot of materials trap moisture and a wet hive is just as bad as a cold hive. If you’re worried about the cold, invest in a commercial insulator.
Feeding
Although it’s most necessary in winter, feeding can also be very helpful at other times in the year, particularly in early spring, when the bees need a jump start. A frame feeder of lighter syrup made of 1 part sugar to 2 parts water will make the colony’s beginning work a lot easier. At this point an entrance feeder is a fine option, too. You should only feed your bees in the beginning to stimulate laying and wax production – take it away when you add your honey super, and only put it back if the colony seems especially weak or sick.