Introduction
Of all the memories you will create as a beekeeper, few will be as exciting and fulfilling as when you install your first bees in your first beehive. From that very moment, you transition from someone who was merely curious about bees to the role of the beekeeper.
It is also when the real learning begins. Indeed, there are some who would say you are not yet a beekeeper! They might argue that until you have successfully seen your bees survive a winter or two you are not yet a beekeeper.
We say – hogwash!
You have researched, purchased, and installed a beehive and you have now installed your first bees. In our eyes, you can call yourself a beekeeper.
Of course, there’s a message behind the “not a beekeeper yet” mentality. Looking beyond a certain beekeeping elitism (which we dislike intensely!), there’s a valid point here.
So while such an experienced beekeeper will, of course, know a lot more about bees than the first-time beekeeper, they are not “done”. They are merely further along the learning curve.
In short, install your own bees in your own hives and feel very free to call yourself a beekeeper.
Take pride in that and then start learning!
So, let’s discuss obtaining and installing package bees, a thrilling experience, coming to you in a small box.
IMPORTANT: There are small differences in how people go about this task. It’s all good – just understand what you are doing and the reasons why and you should be all set.
What Are Package Bees?
The term “package bees” generally creates a curious reaction from non-beekeepers! The idea of transporting 10,000 live bees – which is about 3 lbs of bees, by the way – in a container with mesh sides, is “interesting” to many.
For the more curious of your friends, this will be a time when they are fascinated by your new hobby. Don’t forget to get them involved, if you feel they have a real interest.
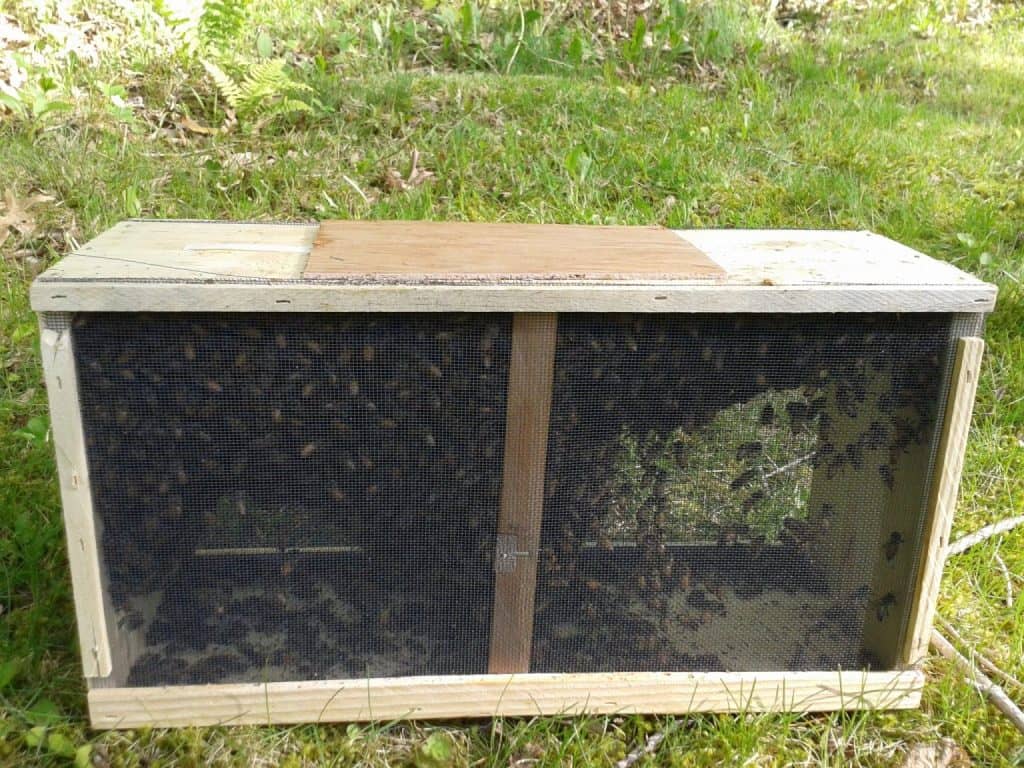
But what exactly IS a package of bees? It includes:
- A small wood crate, with mesh sides through which the bees can be viewed
- A feeding can to sustain the bees for their journey
- A small cage, pinned close to the feeding can, containing a queen and, often, one or two workers
- About 10,000 bees, from a single colony
An important point is that the queen (and her attendant workers, if any, in the queen cage) is generally NOT from the same colony as the rest of the bees. For this reason, an acclimatization period may be necessary.
Obtaining Your Bees
Where to Find Package Bees
Wherever possible, consider picking up your package bees, rather than having them shipped. There are many reasons why this is beneficial, not just for you but also for your bees.
For the majority of beekeepers in the US, locating a local supplier should not be too difficult, with some judicious searching on the web. But if in doubt, contact a local beekeeping club. This is a common question and the chances are that there are a few suppliers that are well-known and respected by the locals.
How Much Do Package Bees Cost?
Like most everything else, the going rate for package bees will vary, based on a number of factors. These include location, reputation of the supplier, time of year ordered, and so on. But as a rough guide, a package might cost between $100 – $160.
When to Order
This is where new beekeepers sometimes get a nasty surprise. With spring in mind as the best time to set up a beehive, there’s a rush and demand often outstrips supply. For this reason, it is important to order your bees early.
Depending on your location, PerfectBee recommends ordering your package bees around January. This isn’t a strict rule but there’s little to lose and it’s sad to see a first-time beekeeper plan, research, and get ready – and then have no bees!
Don’t be that beekeeper.
Collecting and Getting Your Package Home
Ask about the queen. As we discussed, she is likely to be from a different stock. As such, the rest of the bees may not accept her, though this is not always the case.
In some situations, they may have been together in the package for a few days and the supplier might suggest enough time has passed for the colony to be familiar with the queen and her pheromones. That’s fine, but if in doubt isolate them for a few days when you get home.
If all looks well, pay up, put the bees in a cool place in your car, and make your way home.
If this is your first time around so many bees, this is a fascinating drive home! Drive safely and calmly of course. Your bees will enjoy the ride as they get closer to their new digs!
Getting Ready
What You Will Need
Here’s a list of things that you should have at hand when you install your bees.
- Hive tool: You will use this for all visits to the hive and the first one is no different
- Pliers: Useful when you remove the feeder can
- Toothpick: Helpful for exposing the candy in the queen’s cage
- Smoker: A standard piece of equipment that is good to have around
- Misting bottle with sugar syrup: To provide your bees with a little food and to calm them somewhat before you install them
- Protective clothing: Just do it – focus on the job rather than being overly worried about stings
- Feeder: Your bees will need a helping hand nutritionally, as described below
- Entrance reducer: They will also need a hand potentially defending against robbers
- Camera: The first bees are memorable bees. Capture the moment!
When to Install
Late afternoon or early evening is a good time to install your bees. They will be a little calmer at this time while giving them some time to “bed in” for the night.
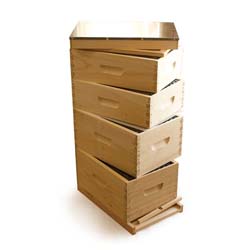
Preparing Your Hive
There is really not much to do to prepare your hive. Just make sure you have everything at hand. You will need to remove 3-4 frames. This gives you room in the hive to a) install the queen and b) pour in your bees, as we describe below.
You should also consider an entrance reducer. Your bees are, believe it or not, relatively few in number. If the hive entrance is attacked by robbers, it will be difficult for a new colony to defend. An entrance reducer can help.
Preparing Your Bees
Most beekeepers spray the bees a few minutes before they install them in the hive. This gives them something on which to feed and also makes them slightly less mobile, from a gentle covering of sugar syrup.
An important note for new beekeepers is not to overdo the spraying! You are not looking to drown them in sugar syrup! Also, the sugar syrup need not be heavy and a 1:1 syrup (one part sugar to one part water) is fine, as compared to a richer 2:1 mixture one might use in the fall.
Preparing You
Are you a bit nervous? Feeling that this is a bigger thing than you expected?
It’s quite common for first-time beekeepers to be nervous around bees that first time, of course. Make the most of those nerves by checking what you do, taking it easy, and recognizing that the first time you spend time with bees is a delightful memory.
But also be aware that what you are doing has been done many times by hundreds of thousands of beekeepers. You have good protective clothing, your bees know what to do and if you take it step-by-step it’s actually a rather straightforward process. So, “preparing you” boils down to getting organized, suiting up, taking a deep breath…and starting. It’s fun!
Oh – and make sure a camera is recording the moment, preferably with video. There’s only one first time!
With everything set up, here are the steps to installing your first bees.
The Big Moment
Remove the Feed Can
Place the package at a comfortable height. Ease off the plywood cover, exposing the top of the feeder can. Give the whole box a little whack, to ensure the bees fall to the bottom. There’s no need to overdo this, by the way. You are merely dislodging them, not trying to knock them cold!
Use your hive tool and/or the pliers to ease out the feed can.
Remove the Queen Cage
The removal of the feeder can provides the space needed to lift out the queen cage. Pull it out, perhaps with a quick shake to dislodge any bees on the outside. Make sure the plywood cover fully covers the hole again.
Check Her Out and Prepare Her Cage
Take a look at your beautiful queen! She’s going to be the focal point of your hive for potentially years to come. If there are a couple of workers in the cage with her, check out the difference in size, color, and shape. You will be looking for this queen many times in the future, so get to know her.
You will notice that the cage is different at each end. At one end there is a small plug, under which is some “candy”. Go ahead and remove this plug with the toothpick but leave the candy in place.
The idea is that once the plug is removed the bees outside the cage can access and eat the candy to get to the queen. She may also help with that, from the inside. This usually takes a couple of days, which allows her pheromones to spread through the hive, allowing the colony to become accustomed to her. Without this candy at the end of the cage, the workers could get to the queen immediately – and potentially reject and kill her.
The candy buys her the time she needs to announce her presence, through pheromones.
Place the Queen Cage in the Hive
With the candy exposed, place the queen in the hive. To do this, bend the tab connected to the cage around the top of one of the frames, adjacent to the gap you made when you removed a few frames. She should hang down from there but do make sure the tab is reasonably secure as it hooks around the top of the frame.
A quick note on feeder placement. If you are planning a hive top feeder (which is a good solution), be sure that there’s no chance of a damaged or dripping feeder being directly over the queen. It is wise to install the queen such that she isn’t directly under the “drip path” of the feeder, just in case.
Pour Your Bees
Now the big moment. Having ensured your queen is installed in the hive, pick up your package bees, remove the plywood cover – and pour 10,000 bees into the gap in the frames. This is the “movie moment”, so make sure you have the camera rolling! It is quite a sight and quite an event!
It is not important you get every last bee into the hive, but most will fall in just fine. When virtually all is done, place the open package on the ground near the front of the hive. You will be surprised how quickly the stragglers exit the package and get to the beehive.
Closing Up
Finally, reinsert the frames you removed, being careful not to knock the queen’s cage down. Then place the inner cover on top, possibly a feeder (surrounded by another box) and the top cover.
You are done!
What’s Next?
There – that was fun, eh? That first time is rather special and we hope you recorded it. Apart from capturing a fun moment, that footage can also help review small things you could have done better.
For now, admire your work but don’t move anything around. You have just installed your first bees. You keep bees. So, regardless of your somewhat limited experience, we have no problem calling you a beekeeper!
Now the fun begins and in a few days, it will be time to get familiar with what to do at each inspection.
Related Content
The following video illustrates a common approach to installing a package of bees.
This video illustrates an alternative method.